One of the two main ways you can install Tournamatch in WordPress is via a File Transfer Protocol (FTP) program. FTP programs connect to the web server where your website is hosted and permit you to transfer files between your local computer and the server. In some scenarios, such as when file upload permissions or file size limitations restrict web uploads, it is necessary to upload Tournamatch via FTP. This article will walk you through using FTP to upload Tournamatch.
The first thing that you need is an FTP program. I highly recommend FileZilla. It’s a free program widely recognized as one of the best. You can use whichever FTP program you wish, but screenshots throughout this guide will reference FileZilla.
After installing your chosen FTP program, you need to acquire FTP credentials from your web host. These are typically found within the cPanel dashboard from your web host. The process can be slightly different for each web host depending on the presence of cPanel and which version, so the best way to retrieve these credentials is to hit up Google. Simply Google “how to find FTP credentials on ____” and replace “___” with the name of your web host.
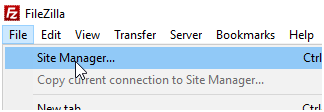
Once you have these credentials, open FileZilla and go to File -> Site Manager.
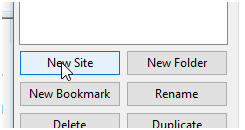
Click on New Site.
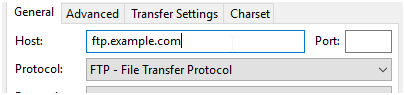
Enter the host name for your hosting account in the Host field.
Select Normal Login from the credentials drop down.

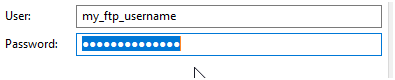
Enter your username in the User field and password in the Password field.
For the majority of web hosting accounts, and if you entered your credentials correctly, you should now be able to connect to your web host. When the connection is established, you will see a directory listing on your right. These are the files in your web hosting account. You shouldn’t rename, move, or delete any folder unless instructed to do so as most of these will have been created by your hosting provider when they setup your hosting account.
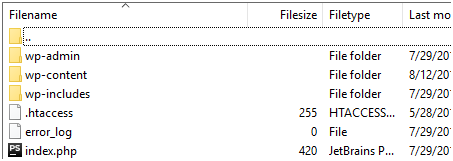
If you don’t immediately see the folders wp-content, wp-admin, and wp-includes along with several other files ending in .php, you may need to navigate to another directory. Look for a directory titled “www”, “public_html”, “html”, or “html_root”. These are the most common names for the “root” directory, or the directory that actually loads when a user visits your-domain.com. If you still can’t find the root directory where WordPress resides, you may find opening a support ticket with your web host is the best place to start for help.
Once you have located the WordPress root directory, navigate to the wp-content/plugins/ directory. Here you will find folder names corresponding to every plugin you currently have installed. This is where you should upload the “tournamatch” directory.
Finally, after uploading Tournamatch, you are ready to install Tournamatch via the WordPress admin page. Login to your WordPress admin account and click on the Plugins menu option. In the list of plugins, you should now see the plugin “Tournamatch”. Click on the link “Activate” and Tournamatch will now install. If you have followed along this far, then congratulations! You’ve just uploaded and installed your first WordPress plugin via FTP. Stay tuned for our next article that will walk you through customizing Tournamatch and getting the most out of it.

Leave a Reply